
A lot goes into owning a motorcycle, and for all the fun that can be had with riding one, there is also a lot of work and knowledge required that goes into maintaining a motorcycle too.
Perhaps one of the most confusing aspects of owning a motorcycle at first can be the motorcycle’s battery.
A lack of knowledge about how a motorcycle battery works, how to maintain it, and what the voltage of the battery is can all lead to improper care of the battery, which ultimately means that you’ll have to replace it altogether, which isn’t cheap!
If you’re new to owning a motorcycle, or simply unaware of what sort of function your motorcycle’s battery does, or what voltage it is, then this guide will help to explain to you all the information you need to know about your motorcycle’s battery.
How Many Volts Is A Motorcycle Battery?
As a general rule, a healthy motorcycle battery can either be at 6 Volts or 12 Volts, but you’ll commonly find that this isn’t the actual voltage they charge at, and they will probably be around 6.3 Volts and 12.5 Volts respectively.
If you’re unsure on what sort of voltage your battery, then typically they have a label on them to signify what sort of voltage they are, so always consult this label before you charge your battery or need to replace it, as you’ll need to make sure that you replace the battery with a like for like replacement.
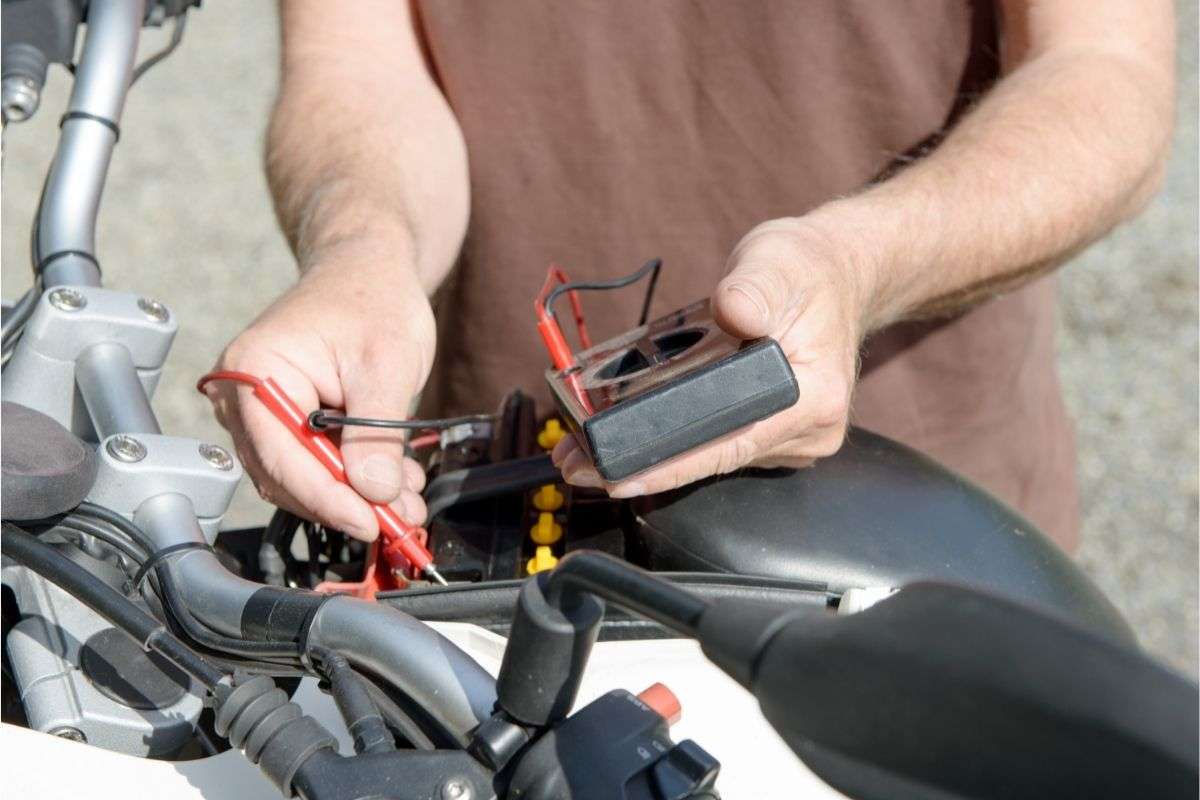
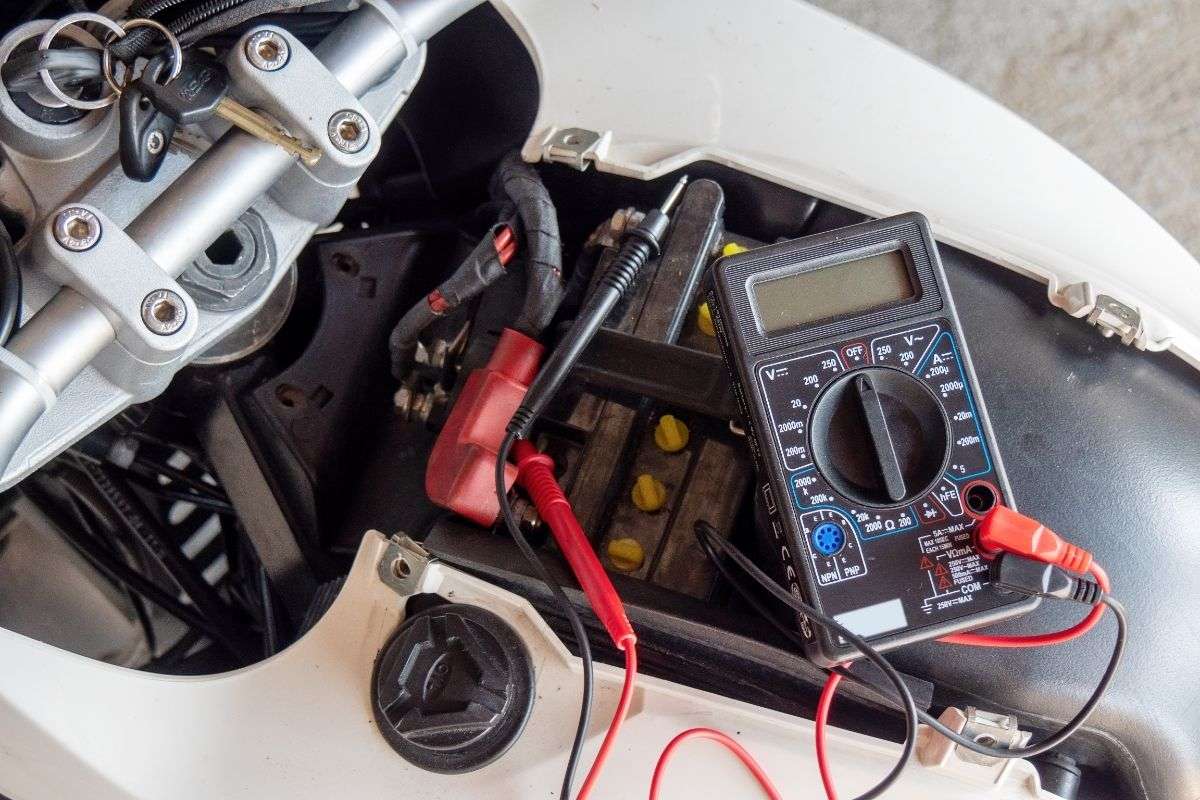
Testing A Battery’s Voltage
If your battery doesn’t have a label that tells you what the voltage is, then thankfully there is another way that you’re able to check.
You’re able to check this using a voltmeter, which provides you with a reliable and accurate reading of your battery’s voltage.
Here’s a step-by-step guide to checking your battery using a voltmeter.
1.Begin by removing the cover for the positive battery terminal, wiping away any dirt or debris that may have built up, and then checking for any signs of corrosion before continuing.
2.Take the positive lead from the voltmeter, and then connect it to the positive terminal of the battery.
3.Repeat this process for the negative terminal of the battery, checking for dirt and corrosion before connecting the negative lead from the voltmeter.
4.This should then allow you to check the reading on the voltmeter. For a 12V battery, a healthy reading should be anywhere from 12.5V to 12.8V. Anything over 12.9 however and it means that your battery is overcharged, if this is the case, simply turn on the motorcycle’s full beam headlights, which should help drain some of the excess voltage.
5.If your battery’s voltage is reading under 12.4V then it’s a sign that your battery is not sufficiently charged, and as such, you should charge it at the soonest available chance.
If the battery reads under 12.2V, then you consider using what’s known as a “Trickle” charger, which is a slower charge and prevents the battery from overheating.
How To Charge Your Motorcycle Battery
If you’re not riding your motorcycle frequently, then your battery is likely to discharge overtime, so as a general rule you should be charging your motorcycle’s battery at least once a month if this is the case.
This will prevent your battery from discharging completely, which is something that isn’t always fixable.
When choosing a battery charger for motorcycle, you need to make sure that the voltage of the charger matches the voltage of your battery.
Another thing to note is the amp of the charger, typically the higher the amp, the quicker your battery will charge.
However, using a higher amp charger can sometimes damage the battery and therefore shorten its lifespan.
You can also choose between a trickle charger and a smart charger.
A trickle charger will charge your battery continuously, and will therefore need you to monitor its progress in order to prevent overcharging.
Whereas smart chargers will be able to detect the condition of the battery and will adjust the charge accordingly, this will help to prevent overcharging and means that you won’t have to check its progress as much.
To charge the battery:
1.Remove the battery from the bike, and then connect the battery to the charger, connecting the black cable to the negative terminal and the red cable to the positive terminal.
2.Then, plug the charger in, and turn it on. Typically, chargers will have a small light to indicate that the charger is on and that it is successfully charging the battery.
3.If using a smart charger, you can then leave this to charge and allow the battery to reach an optimal level. If using a trickle charger, you’ll have to monitor the charging of the battery and ensure that once the battery has fully disconnected, that you disconnect the charger from the battery.
Usually, a charger will also have a light that indicates when a battery has reached its optimal charge.
4.Once fully charged, turn off the charger and unplug it, and then disconnect the leads one by one, starting with the negative lead first.
Lifespan
The average lifespan of a battery is about 2 years, but if well maintained, they can last an extra 7 months, or even an extra year on top of that.
But as a general rule you should look to replace them after the usual two years.
This information will help you to keep a general idea about your battery’s health and when you should think about replacing it.
Conclusion
In conclusion, finding out what voltage motorcycle batteries are, is actually an easy process!
Hopefully with the help of this guide you’re now able to understand what voltage your motorcycle battery is, how to check your motorcycle battery’s voltage and how to recharge it if necessary!
