
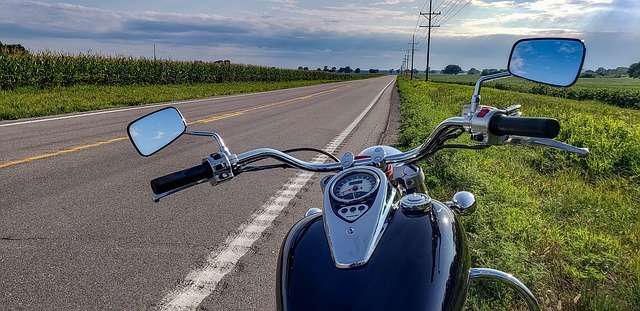
Just like mirrors play an important role in a car, adjusting them to the correct position is helpful to motorcycle riders. Bike mirrors are not only necessary when it comes to changing lanes but are averts serious accidents. However, unlike in motorcars, mirrors on the motorbikes move with the use of a wrench or other tools. That is why, in this blog, we will guide you on how to adjust motorcycle mirrors. Enjoy the read!
Driving school lecturers were not foolish when they asked you to always check your mirrors. The reason is that the rear and the side mirrors are significant when it comes to your safety on the road. Without these mirrors, you will find that you can only see a fraction of the road, and you may find yourself in an accident. While moving them up ways or sideways seems awkward, positioning the mirrors well should be your best habit. Here is how you can do it!
Step 1: set the mirror at the center
To start, set the motorbike mirror at the center at the arm’s end. This is to make sure you get enough fine-tuning flexibility once you secure the arms of the mirror.
Step 2: relax the bolts
After setting the mirror, it’s now time to relax the bike bolts by loosening them using a spanner. Make sure you leave a gap between these two bolts. In case the bolts have chrome, use a rag or a paper on the bolt before using the spanner to avoid damaging the chrome.
Step 3: adjust the motorbike mirrors
To adjust the mirrors, sit on the riding position on the bike. Use a center stand if you have one and if not, ask help from someone. The person can help in holding the bike close to a wall. You can also hold it vertical using hands.
Step 5: After adjusting the mirrors, you need to adjust their arms
Motorbikes are not like cars that come with a wing and central mirrors. If car mirrors are well adjusted, the driver gets a clear rear view without blind spots. But, when it comes to bikes, they do not come with a central mirror, and you usually have huge blind spots. That is why, at times, you are supposed to do some shoulder checks when you feel safe to do so. Any right position for the mirror never lacks a compromise. You either get to see what is behind you and one side of the bike, or see what is on the side but not what is behind you. If caught on traffic, you need to see what is behind you. Also, you need to have a clear view of the right lane (left in the US), since that is where the vehicle comes from. Besides, you don’t want a collision. Therefore, it is good to set the left mirror to view the rear side and the right one for the rear-three-quarter view.
Step 6: tighten the lower bolt
Now that mirrors are in the right place, it’s time to tighten the lower bolt. After that, push the outer bolt with your fingers. Once it gets to the right position, use a spanner to tighten it. In the absence of a spanner, adjust the mirrors a bit on both right and left. After that, turn it clockwise until it gets to the right position. By adjusting in on the arms position, you will get it to the fine-tuning spot.
Adjusting your motorbike’s mirrors is the best way to ensure your safety on the road. However, it is always good to shoulder check before you turn or change lanes. When riding off the road, you can move your mirror upward to see the ones behind you. It is also good to remember to maintain the cleanliness of the mirrors. This is to avoid view obstruction. A dirt mirror may make the vehicle that is clear to appear far. Also, the ones that are further may seem like they are far away. As long as the mirrors are clean and well adjusted, you will ride safely on the road.